WP Typeface Setup
Open the Appearance menu >> Themes.

Click Add New >> Upload Theme >> Choose File.
Upload wptypeface.zip and click Install Now.

Enter your serial number and click Activate. It will show you the expired date if your serial number is valid.

The expired date is when you are no longer getting our updates and support access.

HTML Lang
HTML Lang is how you declare your website’s language to search engines.
By default, it will use your WordPress installation language.
If your content language is different from your WordPress installation language, you need to adjust it by entering your content’s language code.
Visit https://www.w3schools.com/tags/ref_language_codes.asp to see the complete list of HTML language codes.
Example : Your website’s content language is France, so the code is fr. Enter fr to HTML lang field and save.
Privacy Policy Page URL
If you fill in the field with your website’s privacy policy page URL, it will show a Privacy Policy pop-up notification when someone visits your website.
NOTE : On your Privacy Policy page, make sure you write that your website auto-register customers as newsletter subscribers, and they can opt-out later if they don’t want to.
Free Image CDN
Activate this option to load your image files from WordPress’s server.
It is free and faster than loading from your Webhosting. It will save much of your hosting’s bandwidth usage.
It also automatically optimizes your image using the lossless compression method, so you don’t have to optimize it manually one by one.
The downside is, we don’t know when WordPress will stop providing this feature.
Until then, we recommend you use it and switch it off when it stops showing your images.
Show scroll to top button
Switch it on if you want to show the Scroll to Top button on your website’s right side.
Style

Here are some settings that you can do in this menu:
- Set the web icon that you want to appear in the browser tab.
- Set the website background color.
- Set the font, size and color of the text. Line height is the distance between lines.
- Custom Font allows you to enter any font URL to use on your website. You can also use your custom font by uploading it via the media menu and pasting the link in the column provided.
- Set the link color.
Open your homepage in a new tab to preview any adjustment you’ve made in those options.
Header

The explanations of terms that exist in each option :
- Header Style : To set the header background color and header type. Sticky = Header will stay ‘sticky’ at the top even if you scroll down the screen. Need a header with gradient colors? Visit https://cssgradient.io/ >> generate CSS code >> copy and paste it into the Background Gradient column.
- Header Logo : To upload the logo file that you want to appear in the header.
- Login Logo : To upload the logo file that you want to display on the WordPress dashboard login page.
- Logo Text: To display text if you do not have a logo image.
- Logo Spacing: To adjust the distance above and below the logo.
- Top Menu Style : To set the appearance of the menu displayed in the header.
- Top Menu Spacing: To adjust the position of the menu, icon, and adjust the width of the sub-menu.
- Search Form Style: To set the appearance of the product search form. With filter = search form will be equipped with search options by product category.
The menu that appears in the header is any WordPress menu that uses the Top Menu as the display location.

Visit the WP beginner’s guide if you haven’t know how to create a navigation menu.
Social Media
Enter your social media profile’s URL to show Social Media Button on the footer.

Footer

Footer Type : Split your footer into several columns (that you choose) with exact same width.
Each column contains sections like the image below, depending on which setting you’ve adjusted.

Footer Style : Sets the appearance of the title and menu in the footer.
Footer Signature : The text that you want to appear at the very bottom of your website.
Menu ID to Show : The display location of the navigation menu you want to display.
NOTE :
- Each text-formatted column supports HTML tags except shortcodes.
- Columns that are not changed (left by default) will be empty.
Setting up product categories
Open the Products menu >> Categories >> fill in the name column with the category name and click the Add new category button.
Link to display all products from all categories = https://yourdomain.com/shop/
To get a particular category page URL, right-click the view text under the category name and click Copy Link Address.

Preparing product license options
Go to the Products menu >> Attributes.
Fill in the name column and click the Add attribute button. You can create multiple attributes for different product types.
Click Configure terms in the attribute list that you created on the right. In this example, we create an attribute named Font License.

The use of Configure terms is to fill the attribute with the name of the license options that you want to sell.
In this example, we create 3 types of Font License. They are Desktop License, Extended License, and Corporate License. You can change the order of the terms by drag and drop on the circled section.

Publish your product for the first time
Here is how to post your product for the first time. You just have to duplicate the first product and replace the required details when posting the next product.
Open the Products menu >> Add New.
- Write the product name in the Product Name column.
- Write the product description in the text editor under Product Name.
- Choose product categories in the Product categories column.
- Upload the product cover image in the Product Image column.
- Upload the product preview image in the Product gallery column.
7. Complete the description of the zip package contents received by the buyer (optional).

8. Upload the font file for live preview. It is highly recommended to use the OTF/TTF/WOFF file.

9. Click the add more font button if there are several files that you want to preview. Fill in the font name field with your font style or variant.
10. Change Product Data into Variable Product.
![]()
11. Go to the Variations section, select the attribute name created earlier and click the Add button.

12. Check the Used for variations option and click the select all button. If successful, the value column will display all the terms set before. Click the Save attributes button.

13. Go to the variations section. Select Create variations from all attributes and click go.

14. Use the variation with the lowest price as the default form values.

15. Check the enable, downloadable, virtual options and enter the price value of each variation.

16. Fill in the description field with the license description in HTML list format as in the example below.
<li>List Content #1</li>
<li>List Content #2</li>
<li>List Content #3</li>
</ul>
17. Upload the zip file for buyers to download. File name is the text that appears on the buyer’s email and dashboard which can be clicked to start the download process. You can copy-paste the URL file into another variation on the same product

18. Click the Save changes button then click the Publish button at the top right of the page.
Set Product Page and Catalog Style
Open the WP Typeface menu >> Product.
The explanations of terms that exist in each option :
- Product Catalog Box Style = product catalog display options.
- Product Catalog Image Style = image display option in the product catalog.
- Product Catalog Title Style = set the appearance of the product name in the product catalog.
- Product Catalog Price Style = set the price display in the product catalog.
- Product Catalog Category Style = if the selected Catalog Title Style is Type 4, this feature adjusts the appearance of categories in the product catalog,
- License Page URL = if you enter the URL of your license page, above the license options will appear the words What are these linked to the license page.
- Text Before Variation Option = set the text above the license option.
- Variation Option Format = set the license option format.
- Text Before Variation Description = set the text above the license description.
- Button Style = set the appearance of the Add to cart button.
- Custom Note Under Button = display text under the Add to cart button.
- Show Product’s Published Date = display the product posting date.
- Show Sticky Bottom Button = displays the Add to cart button that ‘sticks’ to the bottom of the product page.
- Show Text Selector Font Preview = shows the text selector for font preview.
- Remove ‘product’ from Product’s Permalink = remove the product text from the product page URL.
- Hide Tags = removes the tag list.
- Sell Individual Font Style = enable the Sell Individual Font Style feature. We write down the technical details on a separate page.
Overlay Header
The homepage settings allow you to create an overlay header as shown below (the background image from section #1 blends with the website header).

To activate overlay header mode, you must switch it on, upload a new logo image, and set a link color that matches your background image.
NOTE : The overlay header works only on your homepage. The other pages will use header settings that you’ve set before.

The image below shows the general options of each section’s settings.

Like footer settings, Section Type means you can split your section into several columns.
If you select Default and leave the Section Heading and Description fields blank, the section becomes an empty section.
What are Inner Content, Section’s Heading, and Section’s Description?
The image below will help you understand.

Each Section Type has different content options to show. You will get the idea later when you try it one by one.
Homepage settings global rule
Destination URL : When you fill the text fields with URL, this element will become clickable and bring your visitor there.
Youtube : When you fill the text field with Youtube’s Video ID, it will show the video in that section.
Example : https://www.youtube.com/watch?v=V4PfRI2f96s , V4PfRI2f96s is the video ID.
Search Box : Fill the Placeholder text field with “Search…” or “Search Font…” or anything you like, a search box will show in that section..
BG Gradient = If you need a background with gradient color, generate CSS code using https://cssgradient.io/, copy and paste it to the BG Gradient field.
Each section has an individual save and delete button. That is why we recommend you to set one section at a time to avoid confusion.
With this feature, you can experiment with your website’s style as often as you like worry-free.

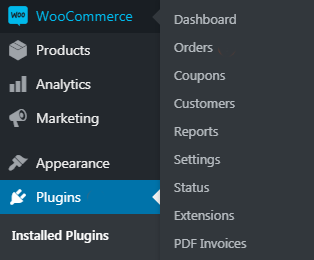
Go to Woocommerce >> PDF invoices
Click Documents tab >> Packing Slip >> disable it (uncheck) >> Save Changes.

Switch to invoice, set it like on the following image, and Save Changes.
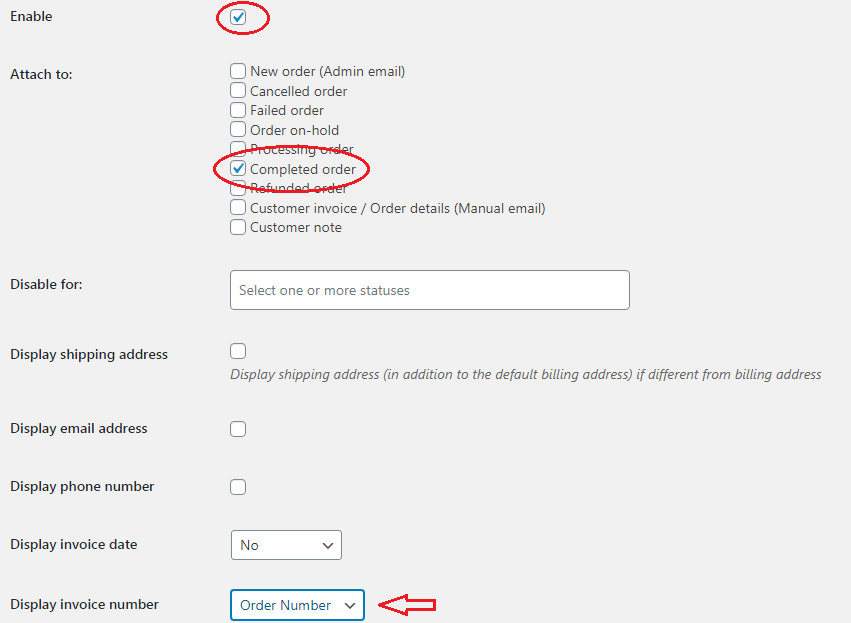
Click General tab >> set it like on the following image.

Upload your logo file. Adjust the height field if you need to. Fill in Shop name and address.
You can add a note to your pdf file using the Footer field.
If your additional note contains a list, write it in HTML format (like product variation description).
Now all your buyers will receive a pdf document containing license usage and your additional note.

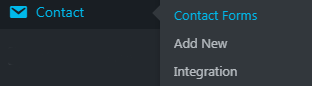
Go to Contact >> Contact Forms.
Copy shortcode to your note and click edit.

Click email tab.

Fill the “To” field with the email address that you use the most so you can know right away when your buyer or potential buyer contact you by form.
Now create a contact page by adding a new page.

Add title and see template on the right side. Choose Contact Form 7 and publish it (click publish button on top right of the page).

Refresh your page editor, and you’ll see Contact Form 7’s field. That is where you must insert the shortcode that you’ve copied before.

You can add text on the text editor to give more context to your web visitor.